MultiMC is a free and open-source, third-party Minecraft Launcher designed to make it easier for players to manage multiple instances of Minecraft. It is available as a free download on Windows PCs (32-bit / 64-bit), macOS (10.13+), and Linux, although you must have a Mojang account with Minecraft purchased. It does not support Minecraft Bedrock Edition as of now and only Minecraft Java Edition is supported.
MultiMC Launcher is designed to be lightweight and user-friendly, providing you with a simple yet powerful interface that allows easy installation of mod loaders like Forge, Fabric, Quilt & LiteLoader. It also allows for easier management of Minecraft mods, modpacks, resource packs, saves, etc. in separate instances of the game.
How to Download & Install MultiMC
The MultiMC download and installation process is simple. Here’s how to do it:
Step 1: Scroll to the top to get the latest version of this app.
Step 2: Extract the downloaded “mmc-develop-win32.zip” archive and launch it via the exe file.
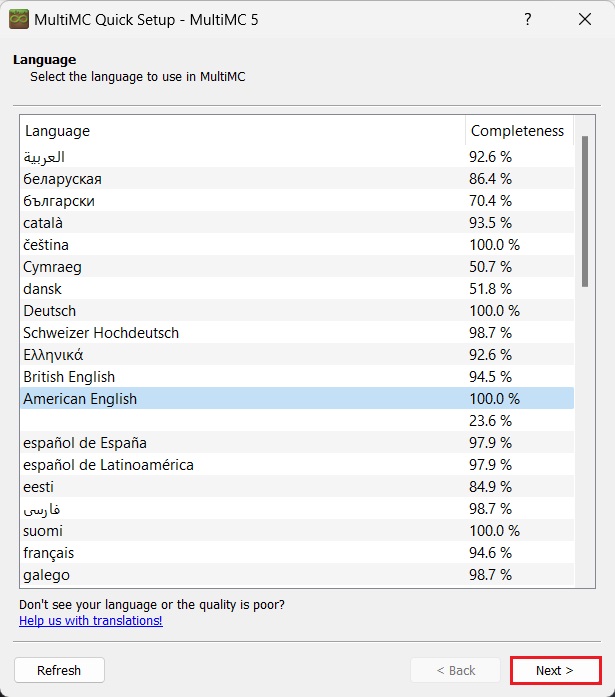
Step 3: In the launcher’s window select your desired language and click Next.
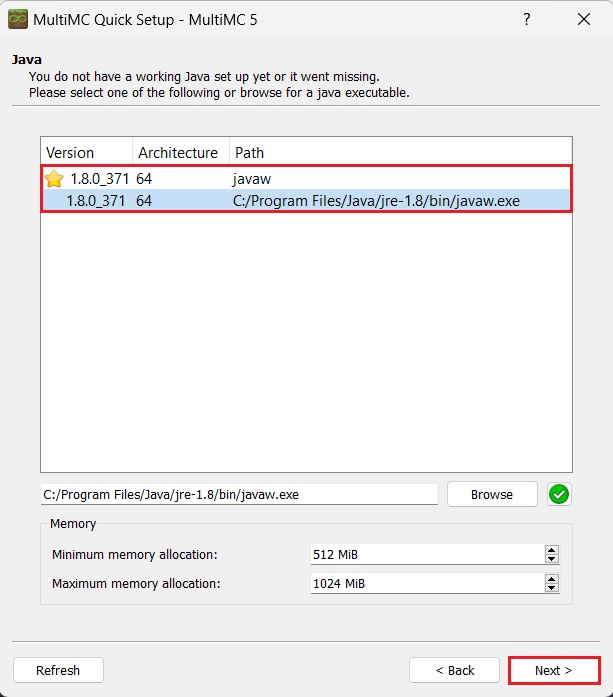
Step 4: Select your Java version and click Next. In most cases just select the one with the star next to it.
Step 5: Enable or Disable Analytics as you think best and click Finish.
How to Use MultiMC
To get started with using this Minecraft Launcher, we first need to add a Microsoft or Mojang account that owns a digital copy of Minecraft. Here’s how to do that:
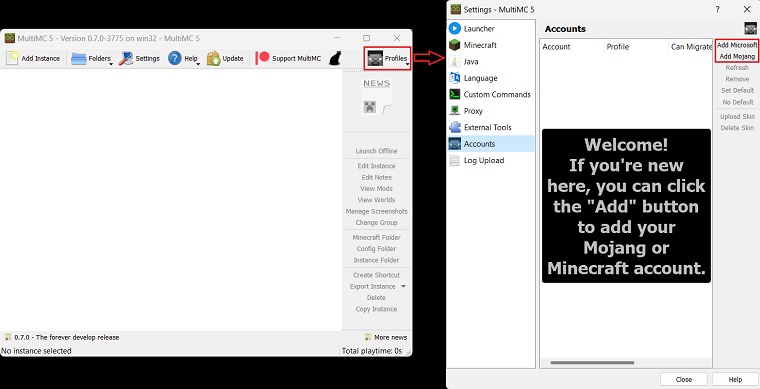
Step 1: Click on the Profiles button in the launcher window and in the new Settings window, click on Add Microsoft or Add Mojang (whichever one you have a Minecraft copy in). Click on Close once you’re done adding the account.
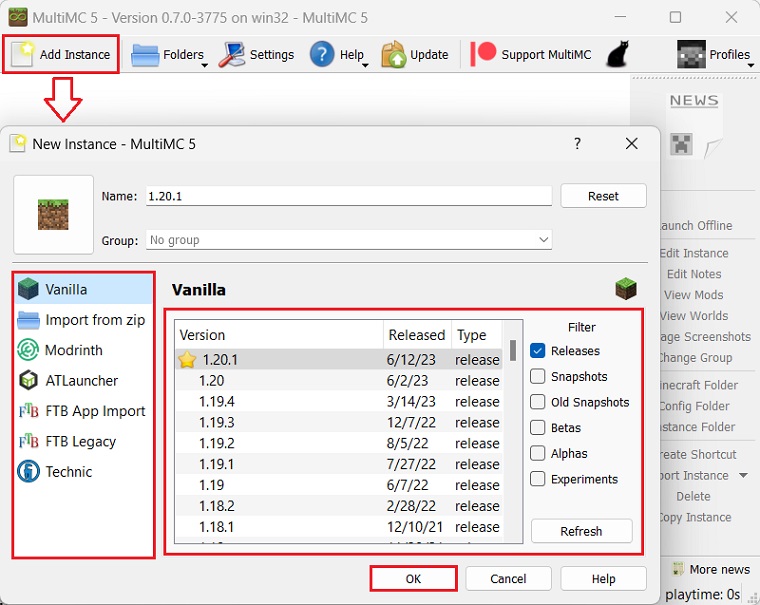
Step 2: Next up we need to add an instance of Minecraft, so click on Add Instance.
Step 3: Click on Vanilla from the left column and then in the right menu select whichever version of Minecraft you want to add. Give it a custom name if you want and click OK.
Note: You can also add modpacks from here by clicking on Modrinth from the left tab and then selecting whatever modpack you want to add.
How to Add Forge / Fabric to Multi MC
Before we can add mods to this launcher, we will need to install a mod loader like Fabric or Forge. Follow the steps below to learn how to add them. For this example, we will add Forge.
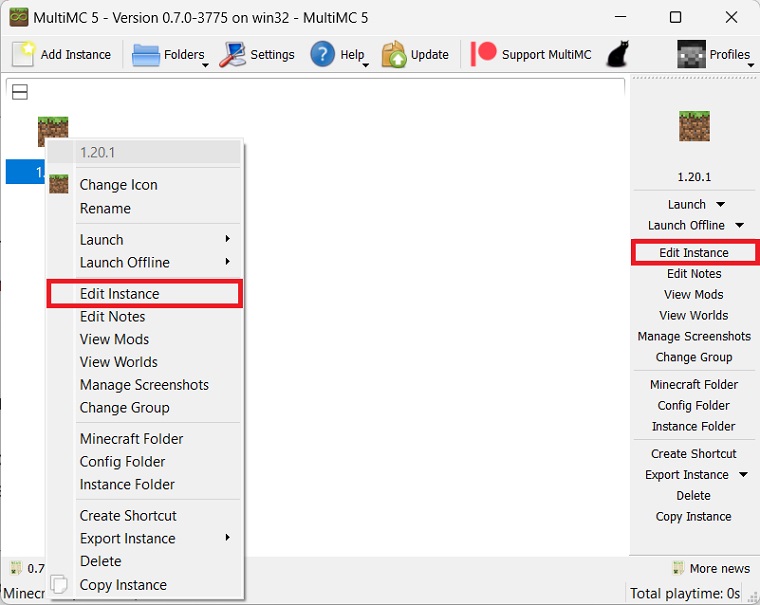
Step 1: Right-click on the instance you want to install Forge/Fabric into and click Edit Instance. You can also select Edit Instance from the right options menu.
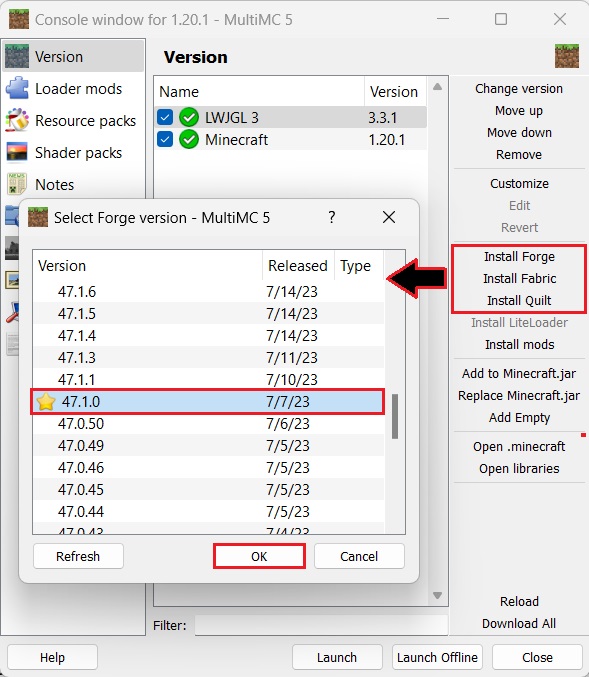
Step 2: Now click on Install Forge / Install Fabric / Install Quilt from the left menu and in the new window select the version of the mod loader and click OK.
Note: This app automatically detects the best mod loader version for the instance of Minecraft you have so it’s best to go with the version that has the gold star next to it.
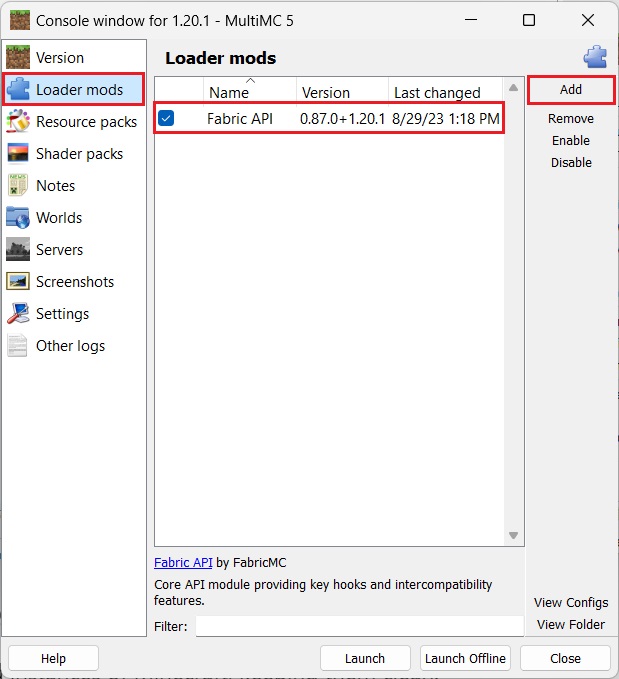
Step 3 (Fabric Mod Loader Only): The Fabric Mod Loader also needs Fabric API for it to load mods properly. So download the right version of Fabric API, then click on Loader Mods from the left menu. Next, click on Add and select the Fabric API file you download and it should appear as shown below.
How to Add Mods to MultiMC
Now that you’ve installed your desired mod loader, you can now easily install mods. Follow the instructions below to do so.
Step 1: Right-click on the Minecraft instance you want to install the mod into and click on Edit Instance as you did before.
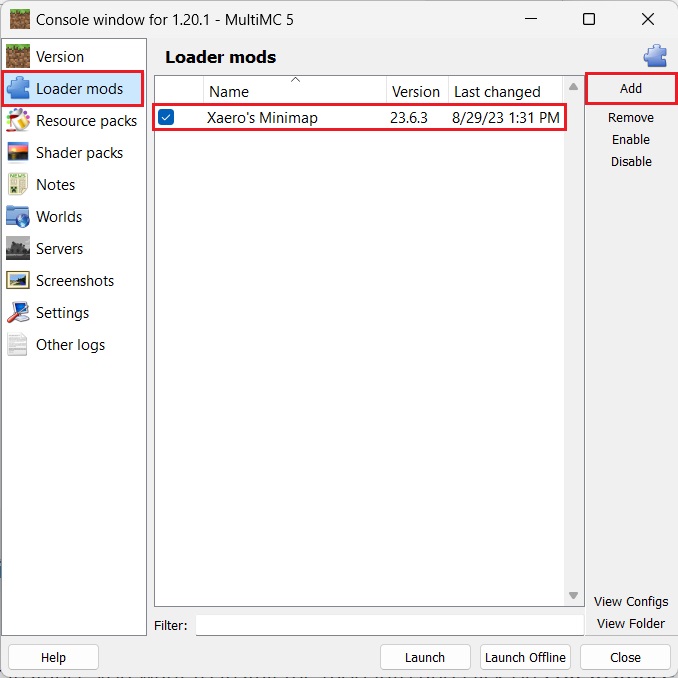
Step 2: Click on Loader Mods, then click on Add, now select the mod you want to load. It’ll appear in the middle section as shown below (We loaded Xaero’s Minimap as an example).
Note: Ensure that the mod’s version supports your Minecraft instance version. Otherwise, the mod will not work.
How to Add OptiFine to MultiMC
The process of adding OptiFine to this app is similar to adding a mod as shown above. However, since OptiFine comes with its installer it can get confusing. Here’s how to install OptiFine in it properly.
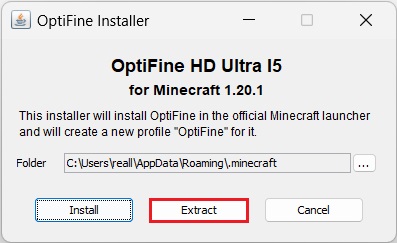
Step 1: Download your desired version of OptiFine and launch it (you will need Java Runtime Environment JRE to launch its jar file).
Step 2: Click on Extract and choose an easy-to-access location like Desktop.
Step 3: Now simply replicate steps 1 & 2 from the “How to Add Mods to Multi MC” section.
Note: Make sure you select the extracted file of OptiFine and not the one you downloaded. It can be identified easily because it will have MOD at the end of its file name.
MultiMC Alternative
There are a few alternatives available but the closest that comes in usability and features would be PolyMC.
PolyMC vs MultiMC
Multi MC has a fork called PolyMC that functions almost the same. There are a few differences like the fact that PolyMC can download mods from Curseforge and Modrinth directly from its launcher. Whereas Multi MC needs to download and install mods manually.
FAQs
Yes, it is completely safe to use and very popular among its users. It is also free of any sort of viruses and malware according to our testing.
Follow these steps to fix this error.
Step 1: Download the zip file from here.
Step 2: Download the server files from here.
Step 3: Create a vanilla instance and then click Edit Instance.
Step 4: Add the latest Forge version to the Minecraft instance.
Step 5: Click the “Open .minecraft” folder.
Step 6: Unzip the modpack zip
Step 7: Open the overrides folder.
Step 8: Copy the folders from the overrides folder into the .minecraft folder of your instance
Step 9: Unzip the server files.
Step 10: Copy the mods folder from the server files into the .minecraft folder of your instance.
Go into the app’s Settings and set it to dev mode instead of release mode.
To fix this error click on Download All located in “Edit Instance > Versions Tab > Download All“.